I’m certain there are thousands – if not millions – of home studios out there, so I decided to share some of my knowledge with all you readers out there. I want to start with microphones.
MICROPHONES:
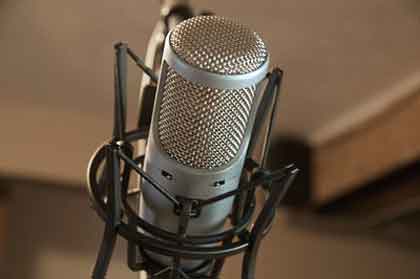
I must say that if you have a tight budget (if you are a teen singer or otherwise) then don’t spend hundreds of dollars on a microphone. I am recording my tracks on a FREE microphone (it came with my keyboard) and I have no side effects, other than the hum of my computer, on occasion. I also sometimes record with a $25 dollar microphone I got a Radio Shack. Both work wonderful so if you have to buy a mic, go to radio shack or wheever and buy a mic. To keep from busting your budget, I would suggest staying under $50. If you don’t have a stand for your mic, than get some duct tape (it is an absolute MIRACLE!) and tape it to your ceiling. Adjust the mic first with scotch tape, because it is not as sticky, than use the duct tape, fist going across the cord, and then using two strips on the side, pressing firmly into the ceiling. I would also getting a microphone extension cord. You can get one of these at radio shack for under $10. Remember to mind the plugs. Make sure that your mic plug will fit into the extension plug (1/4th to 1/4th, 1/8th to 1/8th ect.) If you have basic computer with a primitive sound card with a 1/8th plug (what you see on typical headphones) than you will want to get an adapter, costing arounf $3(for a cheap one) to $6(for a gold-plated one) at radio shack (ask for a 1/4th to a 1/8th, or just when you get your mike, say you need it to fit into a 1/8th jack).
Just go on what your budget will allow. After that, you will need to adjust the mic volume on your computer (do this before you tape your mic to the ceiling, saves you from jumping up from your computer to test you mic and repeating to process). to adjust the volume of your mic, go to the little arrow on the toolbar, and click it. Look for a little speaker icon, click on it, then go to ‘options’ ‘propeties’ ‘recording options’ and make sure that the ‘microphone’ option is cheacked. Click ‘OK’. If you have an ‘advanced’ option under the mic volume, and you click on it, it says ‘mic boost’. Stay away from this if you have a mic that is naturally loud, as it will amplifie background noise. But you can still make great quality recordings, because most of the noise is obscured by your other instruments in the track. Just adjust the slider to what ever you need it to be. Also, when testing the mic, have it about a foot away from your mouth, this will reduce breath noise and make you generally comfortable with it (I don’t think anyone wants anything in their face).
After you’ve done all this, you are ready to record. Oh and stay away from wind reducers (those foam things that go over the mic), they are great for outdoors stuff but will only muffle your vocals. Better use a home-made widescreen, using a bent hanger and some panty hose, or a kleenex. put the wire hanger (needs to be metal as plastic will break) in a diamond shap and stretch the panty house around the frame. To attach it (if you have your mic hanging from the ceiling) just hang that from the ceiling and attach it to the mic with pencils and duct tape (gotta love that stuff). Attach the pencils at the points of the wire frame before putting on the panty hose (or kleenex!). Lastly, to reduce background noise further, get some blankets and either duct tape them to the ceiling, nail them there, or make some sort of wooden frame going floor to ceiling. Make the space at minimum of 4 feet by 4 feet. In your room, make sure that the light is in the middle of the ‘chamber’ as if you are recording for a while, and it is too close to the blankets, they could catch fire. Moving on now…
KEYBOARDS
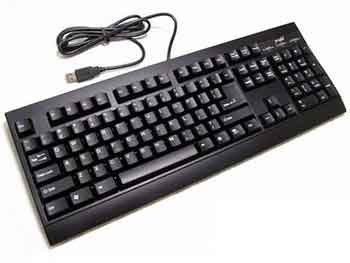
These can be the digital piano things you can get fairly cheap at Walmart (cheapest I saw was $80 (which came with a free mic and MIDI connection, more on that later), which I bought). Make sure you can sit straight in a chair, feet on the floor, hands resting comfortable on the keys. seeing as you don’t need mics (if you have a MIDI connection, or other connection) you can have this right by your computer. You can connect the keyboard after you install the software (if you have a MIDI) to the keyboard with the nessacary USB cord (unfortunetly, they can cost upwards of $30, or just unplug your printer and plug it into your keyboard).
Alternativly, using a spare mic jack on your computer, a double-ended cord, and the headphone jack on your keyboard, you can get by with direct sound but without the MIDI bonuses. All you need to buy is a cord that is used for recording cassette to cassette. It is a mono cord that has a 1/4th plug on one end and a 1/8th plug on the other. These can be purchased at Radio Shack for $5-$6. If you need to plug in a set of headphones into your keyboard, either unplug the cord in your keyboard or plug it into your computer. This brings me to my next section…
HEADPHONES
You can get a good set at Walmart for $20. These will have a standard1/8th plug, mine I got came with an adapter, but if yours doesn’t come with one, head on over to Radio Shack and get a 1/8th to 1/4th jack. The headphones have a ‘cup’ around the actual speaker, you not only will look professional, but you will also hear like a professional. The sound quality rivals those bose headphones, but without the noise reduction. Make sure you have a long cord, though ,the pacage should be atleast a 6 foot (2 meter) cord. You might need to have to get a different extension cord for the headphones, a 1/8th jack will fit the headphones, because if you place two different adapters on an extension cord, you will only get sound in one ear. You need these if you plan on singing with your insrurmentals or a metronome. Moving on…
SOFTWARE
unless you plan to capture all your audio on movie maker and somehow create tracks with it (which is possible but far too complicated to hassle with) I suggest getting some music editing software. I got my software from Best Buy for $15 dollars. This software is called Cakewalk, and has plenty of fancy feaures/audio effects. If you can’t find this, ask an employee for some suggestions, make sure to emphasize the word CHEAP, as their whole goals is to sell you the most expensive software they have (upwards if $500) andyou will find it hard to use as this type of software is good for pros, bad for amatuers. Allow time to play aound with your software, if you need help setting up cakewalk, just send me an email.
OTHER STUFF
make sure that your air conditioner is off, as you will get an annoying buzz in the background of your vocals. Also, try different positions of singing, laying on your back, sitting, standing, whatever. Also, drink somethign warm to loosen your vocal cords. Also, a friend told me that a mixture of lemon juice and water with dissolve flem in your throat, btu you have to drink it at lease once every hour. Do daily practices with scales with your voice, to keep your vocals used to singing. Otherwwise, you will find yourself going hoarse during every recording, and your throat will hurt. Don’t strain your vocals to do something they can’t do.
INSTRUMENTS
You can actual hook up your electric guiatr to your computer, just use the double ended cord described above, put the 1/4th end into the guitar the 1/8th into the computer. If you are recording using an acoustic, use your mic and the ‘blanket room’ and extend it if nessacary, drop the mic to the level of the hole in the guitar, leaving enough room between you and the mic so you can strum the strings. Other instuments I can’t help you with as those are the only instruments I own (besides the keyboard), Sorry! If you don’t have a certain instrument, you can recreat it in cakewalk. Just get a book from the library (get multiple ones) and look for a section on tuning. They should have a section where you tune the instrument to a keyboard. Using the piano roll view in a MIDI track, just place notes on the keys you need, and select the sound you need. After that, just leanr the insrument, and you will be able to make music with an instrument you don’t own! I have actual been successful recreating drums, bass guitar violin and guitar using this method, see more.
FINAL WORDS
I have not included within this article equipment such as compressors and other stuff because to start out with the basics, all you need is the basics, which is your voice and an instrument(s). I wrote this article for all musicians at all stages in their careers, so I hope I have been of some help to everyone reading this. I hope you have a long and succesful music making career!