There are a lot of different bracelet ideas out there and many of them are fairly easy to put together. However, one easy and wonderful bracelet option is using the ladder stitch. This stitch is easy to work and can make some truly beautiful pieces. You can do a wide range of things with a great deal of different kids of beads. It is a great option for working with seed beads and bugle beads as well. Whether making your own jewelry, making gifts, or selling your beautiful handcrafted jewelry this is one option for great bracelets.
The ladder stitch is called such because it looks like a ladder. There are actual several different things you can do with this to make a great piece of jewelry and what you do is up to you. However, with the basic concepts you can let your imagination soar and start with the simple on up to the complex. The ladder stitch requires that you use two needles for making the horizontal ladder that is the main part of the ladder stitch.
The Basics.
There are so many different looks that can be achieved with the ladder stitch that finding one that falls in the basics category for your bracelet is a little difficult. However, a simple ladder stitch isn’t hard to achieve. To do so you will need scissors, beading thread, bead conditioner or beeswax, two bead needles, bugle beads, a clasp, and some glue.
The Directions.
You will want to cut a piece of beading thread that is about three times the length of the finished piece. A bracelet is usually between seven and eight inches with most of them leaning near the seven and one half inch mark. Once you have cut your thread you will want to condition it. Do this by placing the thread on the conditioner pot or the beeswax. Hold it with your thumb or forefinger and pull the thread through so that it is coated with wax or conditioner. Run it through your fingers a few times. This will help prevent knots and keep your thread from fraying, making your overall piece more secure.
Take the first half of your clasp and thread it onto the thread till it rests in the middle with an equal length of thread on each side of the clasp. Next thread one needle onto each side of your thread. Carefully place one bugle bead onto one needle. While that bead is on the needle run the second one through the bead as well going in the opposite direction. Pull both needles through. This will cause the bugle bead to lay on its side horizontally in appearance to the clasp.
You will continue to run the needles through the bugle beads one at a time. Your piece will form a “ladder” with one bugle bead on top of the other. Once your bracelet is the length that you desire it to be add the clasp and run both needles through it. Then go back to the bugle bead before it and run both through that bugle bead. Finish the piece off by carefully making a small knot on one side of the bracelet tight up against the bugle bead. Dab this knot with glue. Make sure you don’t use a lot of glue or it will stiffen the bracelet making it hard to wear.
Design Options.
There are a lot of options for this type of bracelet. You can do it in small or large bugles with some available as large as one inch. It can also be done with more then one color forming a pattern, doing color changes (such as one inch of red, one inch of green, one inch of red), or even a rainbow pattern. It also looks good with beads that are nearly the same color mixed together so that the bracelet seems to change color in the light.
One Step Above Basic.
With so many options out there, there should be more then this. And there is. You can do a lot with the ladder stitch and make a bracelet that are very different from the one described here. For this bracelet you will need scissors, beading thread, two bead needles, bead conditioner or beeswax, bugle beads, seed beads, a clasp, and glue.
The Directions.
You will need to begin by cutting your thread (about three times the bracelet’s finished length) and then conditioning in the same way you would for the basic bracelet. You will begin in a similar manner adding the clasp and then threading each side onto a needle. Add five seed beads onto each strand. Then place a bugle bead onto one needle and run the second needle through the bead. Pull both needles out causing the bugle bead to go horizontal. Thread three seed beads onto each side of the thread and then add another bugle bead horizontally.
Continue to add your beads until you have gone the entire length of the bracelet. Finish by adding five seed beads to each strand and then the clasp. Run both needles through the clasp and then back through the five seed beads. The needles will be going through the opposite set of seed beads this second time around. Carefully knot each side just above the seed bead and pull tight. Push the seed bead over the knot and add a drop of glue. Make sure that you aren’t adding too much glue and making the bracelet stiff. Remember that your glue will run under the beads an up your thread so using just a tiny bit is important.
Design Options.
You can get creative here as well. You can use all bugle beads and have triangles that hook the clasp on and squares that make up the bracelet. You can get creative with the colors and try something bold and contrasting with your seed beads being one color and your bugle beads another. I did one that had dark metallic seed beads and white bugle beads for a very sharp contrast that looked great. You can also use rice shaped beads instead of bugle beads. No matter what you choose your bracelet will look great.
Abandoning the Seed and Bugle Beads.
While seed and bugle beads make this bracelet incredibly easy, you don’t have to use them. You can use a variety of other beads for a great looking piece. Choose any bead that you wish, made of anything that you wish and have fun with it. You will need scissors, beading thread, thread conditioner or beeswax, two needles, 2-3mm beads of any kind, 4-6mm rice shaped beads made out of any material, a clasp, and glue.
The Directions.
You will need to cut your thread about three times the finished length of your bracelet. Condition it by running it over the conditioner or beeswax. Next add your clasp as you fold your thread in half (with the clasp resting in the middle). You will want to thread one needle onto each side of the clasp. Add four round beads (2-3mm) onto each side. Next add a rice shaped bead and run both needles through it so that it rests horizontally and forms your ladder stitch. Add three beads to each side and a rice shaped bead to the middle.
You will want to continue the length of the bracelet. Finish it by adding four round beads to each side and then your clasp. You will once again want to run both needles through the clasp in opposite directions. Then run the needles through the four round beads. Carefully knot and pull tight on each side. Slide a round bead over the knot and add a drop of glue.
Design Options.
You still have a lot of design options to making these great bracelets. You can make it so this bracelet gets wider in the middle. To do this make four or five “rungs to your ladder” and then start increasing the width of the piece with additional beads. You can do this by adding round beads and rice shaped beads in a pattern that is pleasing. This will make it so that the bracelet will widen out. Your next rung could be a round bead, rice bead, and a round bead that have all had both needles go through them (in opposite directions) so that they all rest horizontally.
The next few rungs could be this pattern and then you could step it up with a round bead, two rice beads, and a round bead. Whatever you do, make sure you are following the patterns on both sides of the bracelet so that you get an even piece of work. One way to do this is five basic rungs to your ladder stitch bracelet, then adding three longer ones (with one round bead, one rice bead, and a second round bead), then three longest ones (with one round bead, two rice beads, and a second round bead), and finishing the bracelet with three of the medium length ladder stitch rungs (one round bead, one rice bead, and a second round bead), and finally five regular ones. This bracelet can be beautiful and the perfect beads can be full of charm and color.
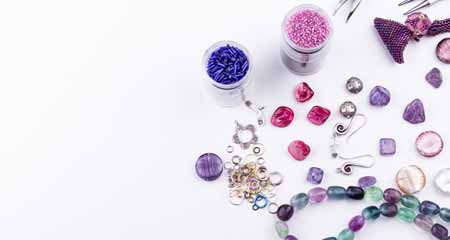
You can also play with a wide variety of bead types for making your perfect ladder stitch bracelet. Gemstone beads are one great option for an awesome looking bracelet. But you don’t have to leave it at that. You can use pearl beads, wooden beads, glass beads, or other types of beads for a great bracelet.
With so many options you can be making ladder stitch bracelets for decades! Have fun designing new and exciting bracelets with all your favorite beads in all your favorite bead colors. Ladder stitch bracelets make great gifts and are perfect for showing off your beautiful beads!